
DIY door installation is a straightforward home improvement project that can save you money and add value to your home. Imagine a beautifully renovated room, or a new, secure entrance, made possible by your own hands. This guide is your comprehensive resource for mastering the art of DIY door installation. It’s designed for beginners and offers clear steps, covering everything from preparation to finishing touches, to bring your vision to life! Many homeowners face challenges when installing a door—from improper measurements and material issues to safety concerns and handling the various tools and parts involved. This guide provides a step-by-step process to ensure a smooth and successful door installation, from preparing the door frame to handling final adjustments. This comprehensive guide will detail every step, ensuring that beginners can confidently undertake the task. We’ll cover all the necessary preparations, crucial tools, detailed installation steps, and helpful tips to guarantee a seamless process.
Planning Your DIY Door Installation
Assessing the Project
Before you even touch a tool, a thorough assessment of the project is essential for a smooth and successful outcome. Assess the condition of the existing door frame. Look for any damage or signs of rot, and decide if the door jambs need to be repaired or replaced. Determine the type of door you need – interior or exterior. This involves considering the specific needs of the space and its intended use. Interior doors often require slightly different hardware and installation techniques compared to exterior doors, so understanding the type of door is crucial. Determine the required measurements for the door and its components such as hinges and handles. Accurately measuring the door frame is critical to ensure the correct door size and fit. A precise measurement ensures you won’t have to make adjustments later, saving time and effort.
Selecting the Right Materials
Choosing appropriate materials is vital for a successful DIY door installation. Ensure you have the necessary tools, including a screwdriver, hammer, level, measuring tape, and utility knife. Selecting quality materials like strong hinges and durable door hardware contributes greatly to the long-term performance of the installation. Also, consider the specific needs of the space, like weatherproofing for exterior doors. High-quality materials not only enhance the aesthetics of the door but also ensure its longevity and functionality. Consider the style and aesthetic of the door you are installing. This ensures that the new door complements the overall design of the room or entryway.
Preparing the Door Frame
Inspecting the Existing Frame
Thorough inspection is crucial before initiating any installation work. Look for any damage, rot, or signs of prior issues. Damaged or compromised wood needs immediate attention. Check if the door frame is square and level. Verify that the frame is securely fastened to the studs to maintain structural integrity. Any frame defects require repair before installation of the new door. Carefully assess the existing structure to ensure it can support the new door safely. This will prevent any structural issues or safety hazards later.
Preparing the Frame for the New Door
Once you’ve identified any issues, address them accordingly. Repair any damages with wood filler or appropriate structural supports. Ensure the frame is completely dry and stable before proceeding. Ensure that the door frame is completely dry and free of any moisture, as dampness can lead to future problems. Double-check the measurements of the new door to the frame to guarantee a perfect fit. Precise measurements ensure a proper fit and avoid costly adjustments later on.
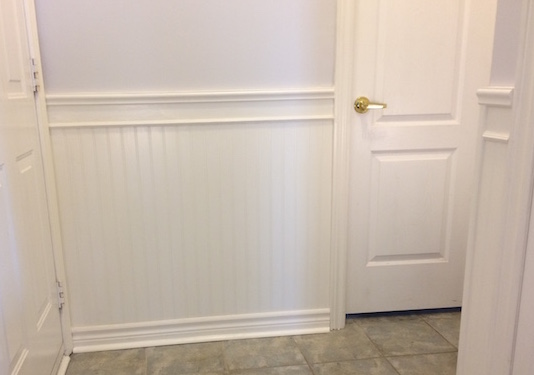
Installing the New Door
Attaching the Hinges
Carefully align the hinges with the predrilled holes in both the door and the door frame. Use appropriate screws and ensure they are tightly secured. The correct placement of the hinges is critical to ensure smooth door operation. Use a level to check that the door is hanging straight to avoid future problems. Take extra care when attaching the hinges, as misalignment can lead to the door not closing or opening properly. Follow the manufacturer’s instructions for correct hinge placement and tightening.
Securing the Door
Once the hinges are firmly attached, check the door’s alignment and operation. Adjust as needed. Ensure that the door closes and opens smoothly. Finally, install any other hardware, such as handles or locks, according to the manufacturer’s instructions. This ensures the proper functioning of the door for years to come. Secure the door frame and door properly to ensure a snug fit and reduce any potential future adjustments.
Finishing Touches and Additional Tips
Final Adjustments
After the door is installed, make any final adjustments to the door, such as checking its alignment and operation. Ensure that the door closes and opens smoothly, without any binding or sticking. This crucial final step ensures that the door is functioning correctly and effectively. Inspect all the hardware for proper functioning and tighten any loose screws.
Door Threshold
The door threshold is an essential element for sealing and preventing air and water leakage. Make sure the threshold is properly installed to ensure your door is secure and prevents drafts.
Safety Precautions
Tool Usage
Safety should be your top priority when handling any tools or materials during the process. Always use safety glasses and gloves when using power tools or working with sharp objects. Ensure you have a secure workspace free from obstacles to prevent accidents and ensure a comfortable workflow.
Proper Lifting Techniques
When handling heavy items or materials, always use proper lifting techniques. Lift with your legs, not your back, and keep your back straight to prevent injuries. Heavy items should always be moved carefully, to avoid any risk of injury.
FAQ
What tools are necessary for DIY door installation?
To successfully install a door, you’ll need a variety of hand tools, including a screwdriver, hammer, level, measuring tape, and a utility knife. Power tools such as a drill and saw can also be useful, but aren’t strictly necessary for simpler door replacements. Having the right tools for the job is essential for ensuring a smooth and efficient installation process. Accuracy in measuring and marking is crucial to avoid costly mistakes. Double-check all measurements to guarantee a proper fit.
How can I prepare the door frame for a new door?
Before installing a new door, the door frame needs careful preparation. Carefully inspect the frame for any damage or irregularities. Repair any damaged parts with wood filler or appropriate materials. Ensure the frame is level and plumb to guarantee the door’s proper alignment and operation. A level frame is critical for a successful installation and ensuring the door functions correctly. Using shims and wedges may be necessary to achieve the right level and ensure a snug fit for the new door.
In conclusion, DIY door installation is a rewarding home improvement project that can save you money and boost your skills. By following the steps outlined in this guide, you can confidently tackle the task, from preparation to finishing touches. Remember to prioritize safety and accuracy throughout the process, and don’t hesitate to seek help if needed. If you’re ready to install a new door, get started now. Installing your own door can be an incredibly satisfying experience. You’ll not only save money but also gain valuable DIY skills that you can apply to other projects around your house.