Cabinet Installation Made Easy: A DIY Guide
Ready to embark on a home improvement project that’ll transform your kitchen or bathroom? Cabinet installation can seem daunting, but with the right guidance, it’s a manageable DIY task. This comprehensive guide provides step-by-step instructions, troubleshooting tips, and essential knowledge to install cabinets with confidence. We’ll address common challenges, highlighting potential pitfalls to avoid, and showcasing the rewarding sense of accomplishment that comes with a successful DIY cabinet installation project. This guide will provide a clear structure, starting with planning, followed by installation procedures, and finishing with valuable insights into maintenance.
Many homeowners are hesitant to tackle cabinet installation projects due to perceived complexity, time constraints, and potential errors. This guide is designed to demystify the process and provide a structured approach to successfully tackling your cabinet installation project. We’ll equip you with the necessary information and practical advice to overcome potential obstacles and transform your space with confidence.
Here’s a brief outline of the content to be covered:
1. Planning and Preparation
2. Tools and Materials
3. Installation Procedures
4. Troubleshooting and Maintenance
Planning and Preparation: The Foundation for a Successful Project
Understanding Your Needs and Requirements
A crucial initial step for any cabinet installation project is meticulously assessing your requirements. Understanding the type of cabinets needed, the specific layout, and the available space is vital. Consider the overall design aesthetic and how the cabinets will function within the existing architecture. Take detailed measurements of the installation area and note any structural or architectural limitations, which can impact the types of cabinets and installation techniques that are suitable.
Sourcing the Right Materials
Carefully selecting the appropriate materials is equally important for both aesthetic and functional reasons. Consider factors like durability, water resistance, and maintenance requirements. Quality materials are essential for long-term cabinet functionality and are often a significant cost, so weigh your budgetary constraints against your needs. Consult with experts or professionals for suggestions to make well-informed decisions.
Designing the Layout
The design layout is essential for maximizing space and functionality. Carefully plan the cabinet arrangement and consider the placement of drawers, shelves, and other features to ensure optimal utilization of the area. Consider the traffic flow, accessibility, and storage needs for enhanced convenience. Designating areas for specific needs can make daily tasks easier, from food preparation to cleaning routines.
Tools and Materials: Essential Equipment
Essential Hand Tools
Gathering the necessary tools is crucial for a successful project. A comprehensive set of hand tools is essential. Essential items include a reliable drill, screwdriver set, hammer, adjustable wrench, measuring tape, level, and safety glasses. This meticulous preparation will minimize potential hazards and ensure the tools’ longevity. Using the appropriate tools guarantees efficiency and reduces the risk of damage to the cabinets or surrounding areas.
Power Tools
While some tasks can be accomplished with hand tools, certain installations, such as cutting cabinetry, will require power tools. A jigsaw, miter saw, and circular saw are essential for precise cuts. Carefully examine the tools for functionality before beginning and ensure that you understand how to use them properly to avoid errors and ensure their longevity.
Materials Selection
Selecting the right materials is critical for a successful and durable cabinet installation. High-quality wood, durable plywood, and sturdy hardware are essential for structural integrity. Choosing the appropriate wood type and finishes is crucial for longevity and aesthetics. Consider the environment in which the cabinets will be used and select materials that are resistant to moisture, warping, or other potential damages.
Installation Procedures: Step-by-Step Guidance
Marking and Cutting
Precise marking and cutting are essential for a perfect fit. Use a pencil and measuring tape to mark the necessary cuts. Use the appropriate power tools, such as a jigsaw or miter saw, and ensure that all measurements are accurate. Using a level ensures that the cuts are aligned correctly with the desired position.
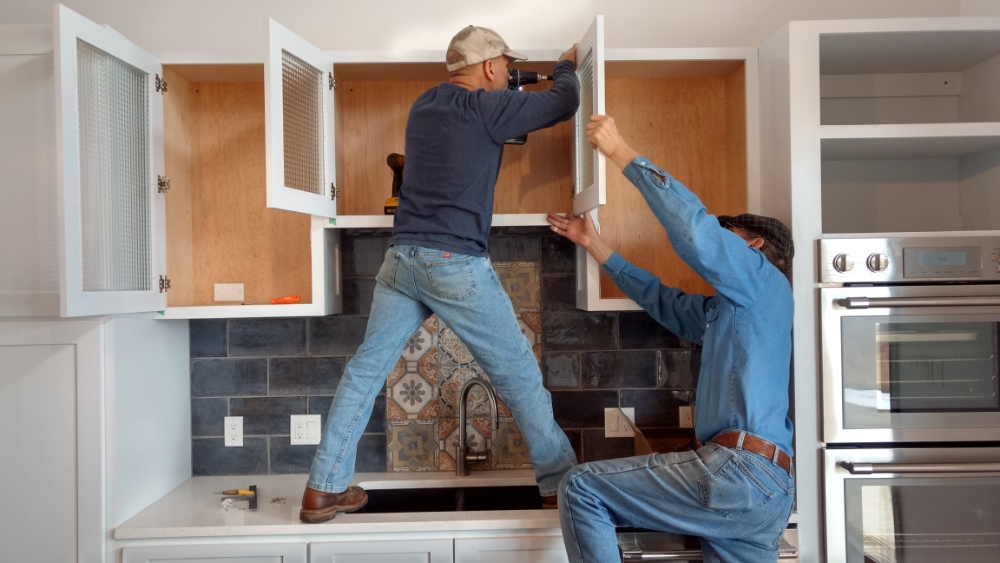
Assembling the Cabinets
Assemble cabinets following the manufacturer’s instructions carefully. Using proper screws, fasteners, and hardware is vital. Pay attention to all steps and double-check your work for any mistakes. Ensure that all components align correctly before finalizing the installation.
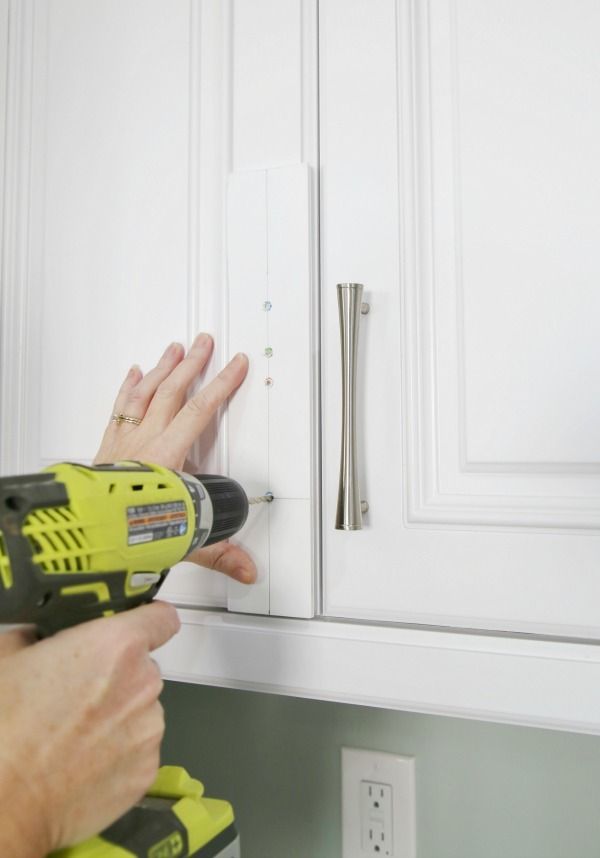
Fixing the Cabinets
Positioning the cabinets in their designated locations is essential. Use appropriate fasteners and hardware to ensure a stable and secure installation. Double-check the alignment and level of the cabinets after fixing them in their designated spots. A level is an important tool in this stage to ensure a flat and sturdy installation.
Troubleshooting and Maintenance: Addressing Potential Issues
Common Installation Problems
Recognizing and addressing issues promptly is crucial for a successful project. One common concern is misaligned cabinets or loose screws. Another issue is uneven floors or walls that may cause misalignment during installation. Be prepared to adjust cabinets as needed to ensure a seamless fit. Inspect cabinets regularly for any damage or warping.
Maintaining Your Cabinets
Regular maintenance will prolong the life of your cabinets. Cleaning cabinets regularly can prevent dirt buildup and structural damage. Keeping hardware in good condition is essential for smooth operation. Use appropriate cleaning agents and procedures recommended by the cabinet manufacturer.
Conclusion
FAQs
Frequently Asked Questions
Q1: What tools do I need for a cabinet installation project?
A1: A successful cabinet installation requires a range of tools, including a drill, screwdriver, level, measuring tape, saw, and safety glasses. Having the proper tools will save you significant time and frustration in the long run. Depending on the complexity of the project, you might also need a miter saw, router, or other specialty tools. Always prioritize safety and ensure your tools are in good working order.
Q2: How do I measure cabinets accurately for a DIY cabinet installation?
A2: Accurate cabinet measurements are crucial for a successful cabinet installation. Carefully measure the space where the cabinets will be placed, noting any obstructions or existing features. Double-check your measurements to ensure precision and avoid costly mistakes. If needed, hire a carpenter for measuring and other specialized work if the cabinet installation is complex or if you lack the required measuring equipment. Using digital tools for measurement can increase accuracy and avoid errors.
Q3: What are common mistakes to avoid during cabinet installation?
A3: Common mistakes during cabinet installation often stem from neglecting crucial steps. For instance, using unsuitable materials or tools for the project or misinterpreting installation instructions can result in a poor-quality or structurally flawed design. Another mistake is rushing the process or skipping essential steps. Make sure to measure twice and cut once, and ensure every step is done with care.
In conclusion, installing your own cabinet is a rewarding experience that saves you money and allows for customization. By following this guide meticulously, you can confidently tackle the project from start to finish. If you’re still feeling hesitant, consider hiring a professional for a seamless cabinet installation experience. Remember to plan ahead, source quality materials, and have patience throughout the process. For any remaining questions, feel free to explore our Frequently Asked Questions (FAQ) section. Happy DIYing!